
Using this shirt decal size chart with Cricut, HTV, and vinyl
In Cricut Design Space, set the artwork width first instead of dragging by eye. Choose the target shirt decal size from the chart, select the design, and type that width into the size field while the lock stays on so the height scales with the artwork. For HTV or Cricut iron-on, mirror the design before cutting and check that the carrier sheet still fits your mat and heat press. A DTF transfer can start from the same width range, but you still need to check transfer sheet size, press pressure, powder edge, and wash-test needs. Adhesive vinyl can help make a vinyl mockup for visual size, but it is not the same production material as HTV, Cricut iron-on, or DTF. If the paper looks too tall, reduce height by editing the artwork or choosing a wider ratio rather than simply making the whole design smaller. For 2XL through 5XL shirts, do not scale the design only because the shirt is larger. The chart keeps front, back, sleeve, and left chest designs within practical press and transfer limits, then asks you to measure the actual blank before production.
Front, back, sleeve, and left chest sizing are different
A shirt decal size chart should not use one number for every placement. A center-front shirt decal can be much wider than a sleeve mark or left chest logo, while a full back decal usually needs a different collar drop and shoulder check. Use the front column for standard T-shirt artwork, the full back column for rear designs, the left chest column for pocket-size logos, and the sleeve column for short-sleeve or long-sleeve marks. Then use the calculator when the actual shirt width, artwork ratio, or placement is not standard.
How to use the Shirt Decal Size Chart and Calculator
- Choose the unit first so every shirt decal size chart and calculator result is shown consistently in inches or centimeters.
- Select the main setup fields, including unit, garment, size, and enter actual blank measurements whenever you have them.
- Review the result and next-step note before cutting, ordering, printing, or pressing.
- Copy the result into order notes, print the guide for the workbench, or download the text result for the job folder.
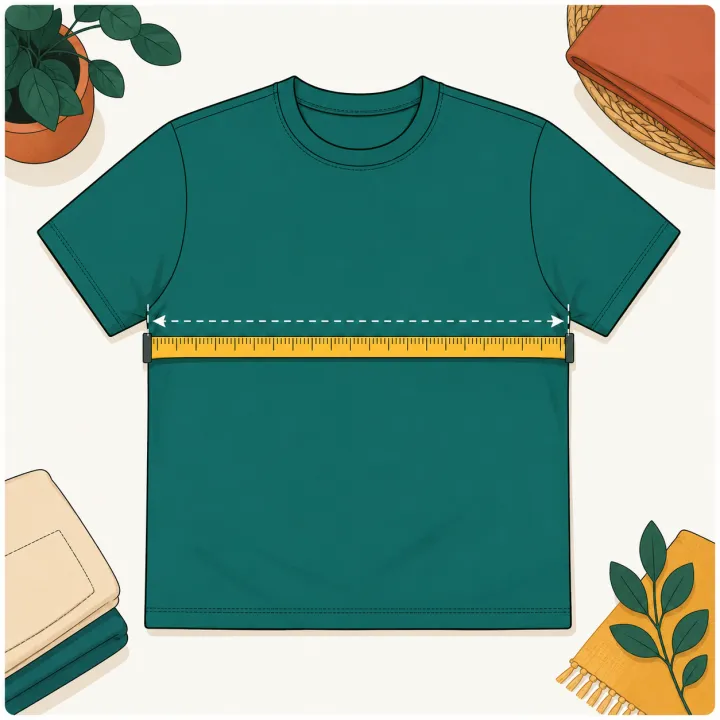
- Measure the actual garment or blank before production and run one test press when the blank is new.
Real-world examples
Shirt Decal Size Chart and Calculator worked example
Inputs
- Unit: inches
- Garment: Adult T-shirt
- Size: Adult M
- Placement: center front
- Design aspect ratio: 1.25
Result
Recommended decal is about 9.60 in wide by 7.68 in high, using the Adult M preset when no custom chest width is entered.
Production check
Measure the real shirt width, confirm the design is not too close to the collar, and reduce size for very soft or narrow blanks.
Adult medium center-front shirt
Inputs
- Unit: inches
- Garment: Adult T-shirt
- Size: Adult M
- Placement: center front
- Design ratio: 1.25
Result
Use a starting decal around 9.5-10 in wide. A 10 in wide by 8 in tall design is usually a reasonable planning size before checking the actual shirt width.
Production check
Measure the blank flat. If the shirt is narrow or very soft, reduce the design before cutting HTV or ordering a transfer.
Youth shirt with a tall design
Inputs
- Unit: inches
- Garment: Youth T-shirt
- Size: Youth M
- Placement: center front
- Design ratio: 0.75
Result
Start near 7-8 in wide, then check height because tall artwork can crowd the collar and hem faster than a wide logo.
Production check
For youth blanks, reduce height first when the design feels crowded.
Units and parameters
Use the placement term that matches the job. A center-front shirt decal, full back decal, sleeve decal, left chest logo, and pocket logo all use different safe starting widths. Keep the unit system consistent in Cricut Design Space, HTV job notes, vinyl test cuts, and printed workbench charts.
| Input or rule | What it changes |
|---|---|
| Unit | Choose the option that matches the job. Starting value: in. Options include Inches, Centimeters. |
| Garment | Choose the option that matches the job. Starting value: adult-tee. Options include Adult T-shirt, Youth T-shirt, Toddler shirt, Hoodie / sweatshirt. |
| Size | Choose the option that matches the job. Starting value: adult-m. Options include Adult XS, Adult S, Adult M, Adult L. |
| Placement | Choose the option that matches the job. Starting value: center-front. Options include Center front, Left chest, Pocket logo, Sleeve. |
| Flat shirt width / pit-to-pit | Enter a measurement or quantity. Optional. Measure the shirt flat from armpit to armpit. Do not enter body circumference. |
| Design aspect ratio | Enter a measurement or quantity. Starting value: 1.25. Width divided by height. Use 1 for a square logo. |
| Formula | Recommended width = usable garment width x placement factor. Recommended height = width / design aspect ratio. Use the factor as a starting point, then measure the actual garment. |
| Production check | Actual garment measurements should override the size preset. |
Rule and assumptions
Recommended width = usable garment width x placement factor. Recommended height = width / design aspect ratio. Use the factor as a starting point, then measure the actual garment.
- Actual garment measurements should override the size preset.
- Preset widths are starting points for planning, not universal production specs.
- If actual chest width is blank, the calculator uses a standard size preset.
Use this tool for
- Sizing a center-front shirt decal before cutting HTV or vinyl.
- Checking adult, youth, and toddler shirt decal size ranges.
- Converting a static Cricut shirt decal chart into a copyable result.
- Choosing a safer starting size for front, back, sleeve, left chest, or pocket designs.
- Planning HTV, Cricut iron-on, vinyl mockups, or DTF transfer orders from one chart.
Worked example
Inputs
- Unit: inches
- Garment: Adult T-shirt
- Size: Adult M
- Placement: center front
- Design aspect ratio: 1.25
Result
Recommended decal is about 9.60 in wide by 7.68 in high, using the Adult M preset when no custom chest width is entered.
When to use this
Use this when you have the artwork ratio but need a practical front decal size before cutting or ordering the transfer.
What to check before pressing
Measure the real shirt width, confirm the design is not too close to the collar, and reduce size for very soft or narrow blanks.
Adult, youth, toddler, and plus-size decal starting sizes
| Use case | Starting point | Check before pressing |
|---|---|---|
| Adult S/M/L front decal | 8.5-11 in wide | Measure the actual shirt and keep the design away from collar and side seams |
| Adult XL shirt decal | 10.5-11.5 in wide | Use this as a starting point, then confirm the real shirt width |
| Adult 2XL/3XL shirt decal | 11-12.5 in wide | Stay inside heat press, transfer sheet, and comfort limits |
| Youth shirt decal | 6.5-9 in wide | Measure the youth shirt and reduce tall artwork before it crowds the collar |
| Toddler shirt decal | 5-6.5 in wide | Use simple artwork and test the paper size on the real shirt |
| Back of shirt decal | 10.5-14 in wide | Check shoulder width and start lower than a front design |
| Sleeve decal | 2-4 in wide | Avoid cuffs, sleeve seams, and tapered fabric |
| Left chest or pocket logo | 3-4.5 in wide | Check pocket edges, buttons, and seam pressure |
| Cricut iron-on, HTV, DTF transfer, or vinyl mockup | Use the same starting width for fit checks | Production checks differ by material; adhesive vinyl is only a mockup aid |
Common mistakes
- Using an adult center-front width on a youth shirt.
- Ignoring design aspect ratio when converting a square logo to a wide graphic.
- Pressing too close to a collar, pocket seam, or sleeve cuff.
FAQ
What size should a shirt decal be?
Adult center-front decals usually start around 9-11 inches wide. Youth shirts often work better around 7-9 inches, toddler shirts around 5-6.5 inches, and left chest logos around 3-4 inches wide.
What size decal for an XL shirt?
For an adult XL shirt, start around 10.5-11.5 inches wide for a center-front decal and about 11.5-12.5 inches wide for a full back decal. Measure the actual shirt flat before cutting HTV, setting up a Cricut iron-on file, or ordering a DTF transfer.
What shirt decal size should I use for kids or youth shirts?
For youth shirts, start around 6.5-9 inches wide depending on size and artwork shape. For toddler shirts, start around 5-6.5 inches wide. Always check the actual shirt width before cutting HTV or vinyl.
Should I size by shirt size or actual width?
Use the chart as a starting point, but actual garment width is more reliable than the size label. Two adult medium shirts can have different usable print areas.
Can I print or download the shirt decal chart?
Yes. Use the print or download buttons above the calculator to keep a local chart beside the cutter or heat press.
What size decal for a 2XL or 3XL shirt?
For 2XL shirts, start around 11-12 inches wide for a center-front design and 12-13 inches wide for a full back design. For 3XL shirts, start around 11.5-12.5 inches wide for center front and 12.5-13.5 inches for full back. Measure the actual shirt before production.
Why shouldn't I scale the decal up linearly for plus sizes?
A larger size label does not mean the printable area grows at the same rate. Side seams, body cut, customer preference, heat platen size, gang sheet width, and comfort all limit how large a design should become.
What size should I make a shirt design in Cricut Design Space?
Choose the target width from the chart, type that width into Cricut Design Space, keep proportions locked, and mirror HTV before cutting. Use a paper test on the actual shirt before cutting production vinyl.
Are HTV, Cricut iron-on, and vinyl shirt decal sizes different?
The starting width is usually similar, but the production check is different. HTV and Cricut iron-on need mirroring and heat press clearance. Adhesive vinyl mockups can help check visual size, but they are not a substitute for a heat press test.